Crafty Schamfty Fridays 8
Welcome dear loyal Crafty Schmafty Friends!!! Yes, yes, I skipped a week. I have no excuses - other than this thing called life that sometimes gets in the way of doing what I really want to do . . . and that is, of course, CREATING!!! So, please forgive me . . . and hold on tight . . . because this week we have a WONDERFUL project that is not only Crafty AND Schmafty, but LOADS OF FUN, too!

This weeks project comes directly from PINTEREST. Oh, I just ADORE Pinterest. Whenever I am feeling a void in the crafty department, I head over there for INSTANT inspiration, ideas and joy! If you aren't pinning . . . well, you should be. It really is the most user friendly way to catalog those online ideas, projects, products and things that make you happy. LOVE LOVE LOVE Pinterest. (Please note, I am not being reimbursed, in any way, for tooting my Pinterest horn. I just love it THAT much, that I have to share!)
So, last week I wanted to do a project that was different than my usual painting. I also wanted to make something to hang on the door of our house, because Spring fever hit and I wanted to liven things up a bit. So, I decided to try my luck at making a rose felt wreath. My friends . . . the project itself was SUPER easy, it only took a few hours, and minus a few hot glue gun burns - it was painless and fun!
It starts like this . . . gather up some really simple supplies from your local Walmart, Michaels, or crafty making store. You'll need:

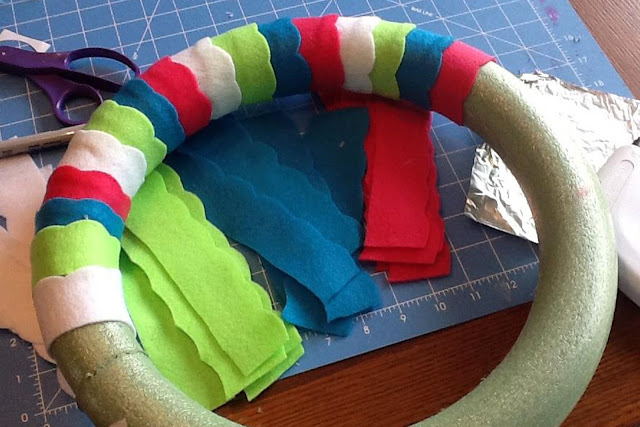
I wanted to make some sort of scalloped design with the felt, so I measured a piece of paper (the black piece below) to my wreath, and used that as my template for cutting the felt. I think the width of each strip was about 6 1/2", so I was about to get about 5 strips per sheet of felt. Don't worry - you will use the rest of the felt for your flowers . . . this is a MINIMAL waste project!


Once all my strips were cut, I hot glued them onto the wreath - over lapping slightly. (Special thanks to PG for being my close-up photographer!!)

Here it is in progress . . .

Once the circles were cut, I simply cut the circle continuously all the way to the center. I just realized that I didn't take a picture of what the completed cut looked like, but perhaps you can imagine it with the next two pictures.

See . . . keep cutting to the very center of the circle . . . so the circle is one long continuous swirl.

Next, you will start in the center and roll the swirl up, hot gluing were ever you think you need a little additional support (and HERE is where the finger burns really came to be! Oh, the pain I'll go through for a little Crafty Schmafty Friday post!!!)

Little by little you roll the felt up . . .

Keep going . . . you are almost there . . .

Voila!! See? It's a ROSE!!!! Pretttttttyyyyyyyyyy!

Now, make a WHOLE BUNCH of the roses, and glue them to the wreath where ever you'd like them to be! I decided to place mine on the bottom left side. No reason . . . it's just want I felt like doing at that particular moment. Again, with the different size circles you will create different size roses. They really are so lovely!

Just a few more roses . . . .

I have enough felt left to make two or three more roses, but Phil and the girls were waiting on dinner, so I had to stop here. I would recommend that as you make your wreath - keep putting it on the door or the wall where you are going to finally hang it, and make sure you are placing your roses where they are filling up the best space. Seeing it on the table flat looks completely different than on the door - and you may find you need to add more roses towards the center of the wreath than you originally intended.

And one more photo . . . here is the finished wreath!!

Welcome to our 8TH INSTALLMENT of

This weeks project comes directly from PINTEREST. Oh, I just ADORE Pinterest. Whenever I am feeling a void in the crafty department, I head over there for INSTANT inspiration, ideas and joy! If you aren't pinning . . . well, you should be. It really is the most user friendly way to catalog those online ideas, projects, products and things that make you happy. LOVE LOVE LOVE Pinterest. (Please note, I am not being reimbursed, in any way, for tooting my Pinterest horn. I just love it THAT much, that I have to share!)
So, last week I wanted to do a project that was different than my usual painting. I also wanted to make something to hang on the door of our house, because Spring fever hit and I wanted to liven things up a bit. So, I decided to try my luck at making a rose felt wreath. My friends . . . the project itself was SUPER easy, it only took a few hours, and minus a few hot glue gun burns - it was painless and fun!
It starts like this . . . gather up some really simple supplies from your local Walmart, Michaels, or crafty making store. You'll need:
- Styrofoam wreath (I picked mine up a Michaels - had a coupon!) You can really make yours any size you'd like. My wreath was either 12" or 14".
- Felt (in whatever colors work for you. For my size wreath, I bought four sheets of each of the four colors I was using. I wanted bright colors, so I went with a hot pink, lime green, bright blue, and white)
- Glue gun and glue sticks
- Small piece of ribbon (to hang your wreath)

I wanted to make some sort of scalloped design with the felt, so I measured a piece of paper (the black piece below) to my wreath, and used that as my template for cutting the felt. I think the width of each strip was about 6 1/2", so I was about to get about 5 strips per sheet of felt. Don't worry - you will use the rest of the felt for your flowers . . . this is a MINIMAL waste project!


Once all my strips were cut, I hot glued them onto the wreath - over lapping slightly. (Special thanks to PG for being my close-up photographer!!)

Here it is in progress . . .

Once the wreath was covered, I started to work on the roses. I gathered a few different circular shaped objects from my house, and used them as templates for the circles. I wanted different sizes roses, so I used about 4 different size circles. I traced the shapes on the felt, then cut the circles out.

Once the circles were cut, I simply cut the circle continuously all the way to the center. I just realized that I didn't take a picture of what the completed cut looked like, but perhaps you can imagine it with the next two pictures.

See . . . keep cutting to the very center of the circle . . . so the circle is one long continuous swirl.

Next, you will start in the center and roll the swirl up, hot gluing were ever you think you need a little additional support (and HERE is where the finger burns really came to be! Oh, the pain I'll go through for a little Crafty Schmafty Friday post!!!)

Little by little you roll the felt up . . .

Keep going . . . you are almost there . . .

Voila!! See? It's a ROSE!!!! Pretttttttyyyyyyyyyy!

Now, make a WHOLE BUNCH of the roses, and glue them to the wreath where ever you'd like them to be! I decided to place mine on the bottom left side. No reason . . . it's just want I felt like doing at that particular moment. Again, with the different size circles you will create different size roses. They really are so lovely!

Just a few more roses . . . .

I have enough felt left to make two or three more roses, but Phil and the girls were waiting on dinner, so I had to stop here. I would recommend that as you make your wreath - keep putting it on the door or the wall where you are going to finally hang it, and make sure you are placing your roses where they are filling up the best space. Seeing it on the table flat looks completely different than on the door - and you may find you need to add more roses towards the center of the wreath than you originally intended.
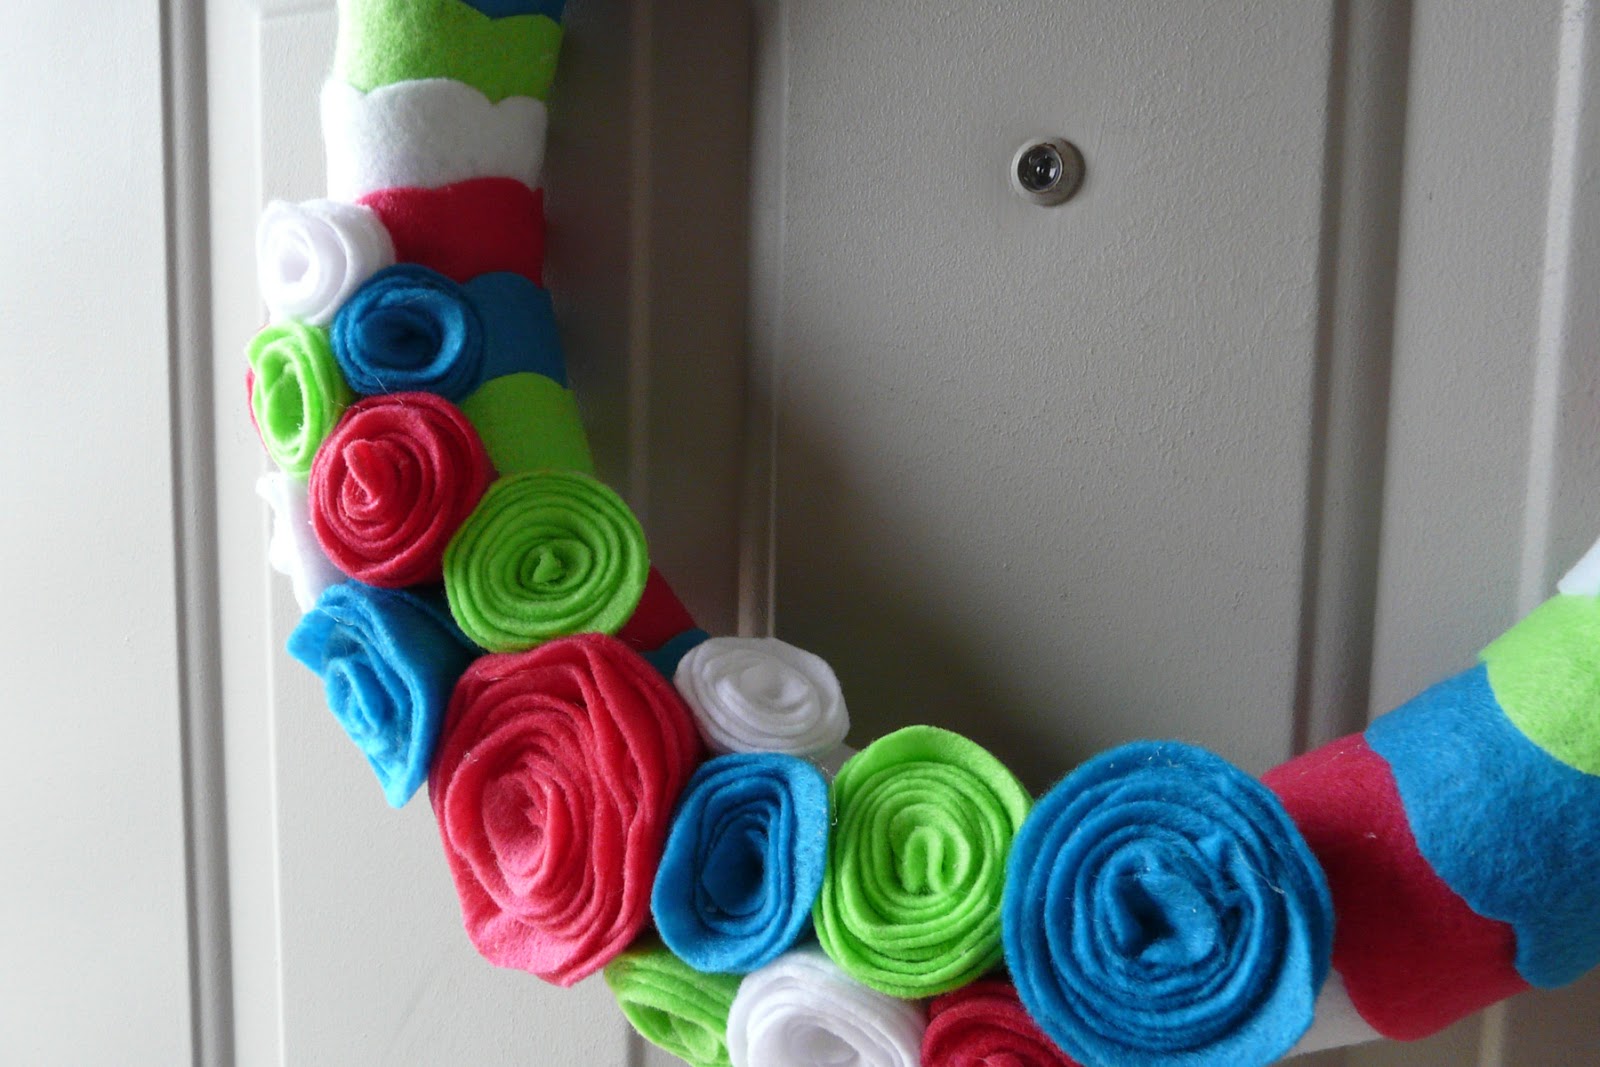
And one more photo . . . here is the finished wreath!!

It really was a super fun project and really quite simple . . . and the whole thing took me only three hours. Now that I am finished, I want to make one for every holiday in a million different color themes. That's what I tend to do . . . when I complete a project that I have a fun time doing, I want to do it 100 more times. So perhaps I'll have to make them for Christmas gifts . . . or birthdays . . . or anniversaries . . . OOOooooo, the possibilities are ENDLESS!
Thanks for joining in this weeks party. PLEASE Pin this, if you'd like . . . and share with your friends. Make one yourself, and let me know on my facebook page that you did! Share a photo of yours . . . I'd love to see what you come up with! And leave a comment and let me know how you like it.
Wishing you a wonderful, crafty schmafty and Peaceful day, my friends!


What a great project!!! Love:O) Happy Easter:O)
ReplyDeleteIt looks fabulous!! Going to share on FB:) You are on a roll!!! Happy Easter!!!!!! xoxoxoooxoxo
ReplyDeleteI LOVE Pinterest too! The finished wreath looks AMAZING on your door! LOVE IT!
ReplyDelete